On-page SEO is the process of optimizing individual web pages to improve their visibility and ranking in search engine results pages (SERP). It focuses on everything that exists within a webpage, including content, HTML elements, site structure, and user experience signals. Using a proper on-page SEO checklist helps ensure all these elements are optimized so search engines can better understand and rank your pages.
Unlike off-page SEO, which relies on external factors such as backlinks, on-page SEO provides direct control over how your content is presented to website visitors and interpreted by search engines.
If you want to rank your website on search engines, then it’s important to optimize your targeted pages for all the on-page SEO factors. Once you perform on-page SEO correctly, it will help search engines understand your page clearly and rank it for the relevant keywords.
In this article, we have mentioned all the important onpage SEO checklist, factors and their best practices. By following these methods, you can surely achieve better rankings & impressions for your website.
Table Of Content
- Primary Keyword / Focus Keyphrase
- URL / Slug
- Title Tag
- Meta Description
- Heading Tags
- Image Optimization (Name, Alt, Title Attributes)
- Internal Link
- Outbound Link
- Content Length & Quality
- Keyword Density
- Keyword Distribution / Proximity
- Avoid Keyword Cannibalization
- Broken Links & Redirection
- Schema Markup
- OG Tags
- W3C Code Validation
1. Primary Keyword / Focus Keyphrase
A primary keyword (or focus keyphrase) is a specific search term you want a webpage to rank for on search engines like Google. It represents the core topic of the page and directly reflects what users are searching for when they land on that page.
You need to perform in-depth keyword research to find relevant search terms that your target audience uses in Google searches to find products or services you offer. You can use keyword research tools like Google Keyword Planner, Ubersuggest, SEMRush or Ahrefs.
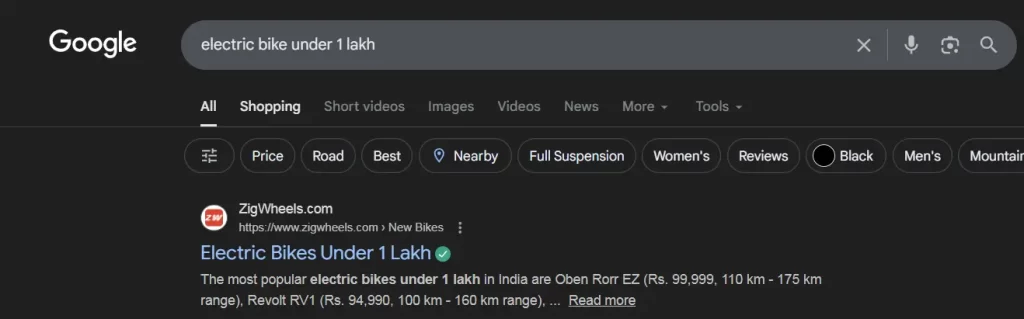
For example, if you are selling electric bikes, then you can target keywords like “electric bikes under 1 lakh” or “best electric bikes in India”.
Best Practices for Primary Keyword
- Use only one primary keyword per page.
- The primary keyword’s search intent should match the page’s content.
- Always prefer medium tail or long tail keywords, and avoid short tail keywords.
- Avoid repetition of the same keyword on more than one page.
HTML Syntax:
- <meta name="keywords" content="keyword1, keyword2, keyword3">
- The above code should be placed in the <head> section of the webpage.
For WordPress Sites:
If you’re using WordPress or any other CMS, then you can use plugins like Yoast SEO, Rank Math, etc. This will reduce your involvement with the HTML codes. Here, we are taking the Yoast SEO plugin for WordPress as an example
- Install the plugin by visiting your WP Admin’s plugin section
- Edit the particular page/post for which you want to perform onpage SEO
- At the end of the page, you will see a section of Yoast SEO settings, where you can enter your Focus Keyphrase as shown in the image.

Also, you can refer to our detailed guide on various types of keywords in SEO to understand and finalize your primary target keywords.
2. URL / Slug Optimization
A URL (Uniform Resource Locator) is the web address that points to a specific webpage. It is what users type in a browser or click on in search results to access a page.
URLs are made up of several components, including the protocol (http/https), subdomain, domain, TLD (.com, .in), and the slug.
Every webpage has a distinct slug, which appears at the end of the URL. It identifies the specific pages and helps search engines understand the content & site structure.
For example, if the URL is: https://www.example.com/electric-bikes/, then /electric-bikes/ is the slug of the webpage.
Best Practices for URLs / Slugs Optimization
- Always include the primary keyword in the slug.
- Keep the slug short by removing any unnecessary extra words like - and, of, the.
- Use lowercase letters and hyphens (-) to separate words
- Use the HTTPS protocol, as it represents that your website is secure and recommended by all search engines.
- Maintain a logical hierarchy reflecting your site structure
- Never change slugs once finalized until it's really necessary to prevent link rot.
For Coding Websites:
- The filename itself becomes the slug, there is no need to put any extra code. For example if your file name is onpage-factors.html, then slug will remain the same /onpage-factors.html
For WordPress Websites:
- You can edit the slug either by Yoast SEO plugin or using the classic editor.


3. Title Tag
A title tag is the clickable headline that appears on search engine results pages (SERPs), browsers, and social media platforms. It acts as a webpage’s headline, or page title, and helps users and search engines understand the page’s content.
A well-written title tag improves click-through rates (CTR) and boosts SEO performance. Title tags (also known as meta titles or meta title tags) are essential on-page SEO elements that impact user experience and search engine rankings.
They serve as users’ first impressions of your page and play a role in search engines’ indexing and ranking decisions. For instance, a clear and engaging title tag can set user expectations, leading to higher engagement.
Best Practices for Title Tag Optimization
- Keep the length of title tag between 50 - 60 Characters.
- You should include the focus keyphrase in the title tag, as it will be analyzed by the search engine or user. You can also use the secondary keywords but avoid keyword stuffing as it can look spammy.
- Keep title tag relevant to website’s page content to prevent high bounce rate.
- Keep a different title tag of each page of your website to avoid confusion and duplication.
- Avoid special characters for title tags because it reduces readability and also reduces the CTR.
HTML Syntax:
- <title>Your Page Title Goes Here</title>
- The above code should be placed in the <head> section of the webpage.
For WordPress Sites
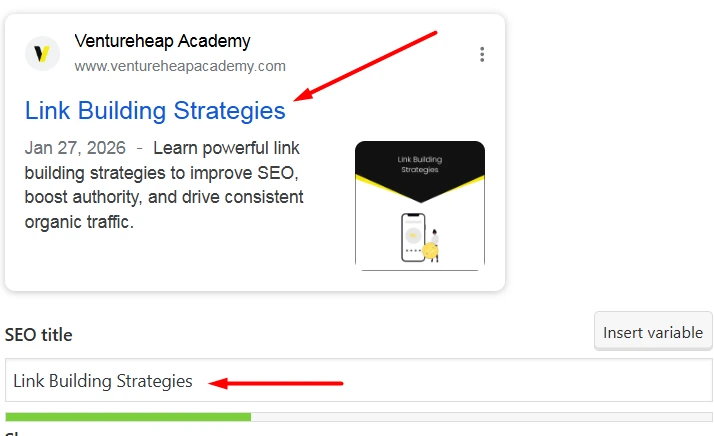
- The H1 heading (page or post title) is used as the title tag by default, meaning the same title appears on the page and in search engine results.
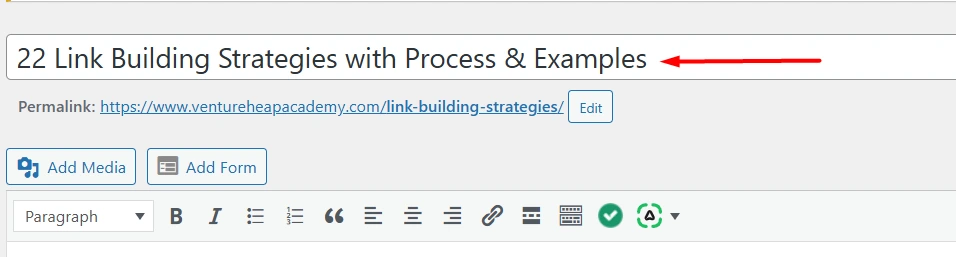
- If you want to change how the title appears on the SERP, you can edit the SEO title using the Yoast SEO plugin in the Yoast panel located at the bottom of the blog editor, without changing the on-page H1.
4. Meta Description
A meta description tag generally informs interest and users with a short , relevant summary of what a particular page is about.
They are like a pitch that convinces the user that the page is exactly what they are looking for.
Best Practices for Meta Description
- Keep your meta description content between 150 - 155 characters because long description may get cut off in search results
- Tell users exactly what your page is about in plain, straightforward language. Avoid vague or ambiguous statements.
- Avoid using the same meta description across different pages. Unique descriptions not only help users understand each page's content but also prevent confusion for search engines.
HTML Syntax:
- <meta name="description" content="On-page SEO is the process of optimizing individual web pages to improve their visibility and ranking in search engine results pages ">
- The above code should be placed in the <head> section of the webpage.
For WordPress Sites
-
By default, WordPress or your SEO plugin automatically generates a meta description from your content if you don’t set one manually.
-
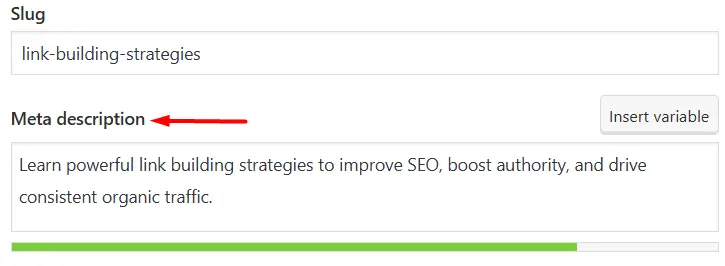
To customize how your page appears in search results, you can add or edit the meta description in the Yoast SEO plugin box at the bottom of the blog editor, where you can write a search-optimized description for Google.
5. Heading Tag
The heading tag is used in HTML to define headings of a page. Headings are defined by <hn> , with “n” being a number between 1 and 6, and determines which position a heading has in the hierarchy of the heading structure.
Best Practices for Heading Tag
- Avoid using h1 multiple times because it can confuse the readers and google understand your text.
- Follow a logical hierarchy structure of headings and subheadings.
- Avoid overusing of heading tags.
- Keep your headings descriptive as it can make it easier for readers to understand what each section is about.
HTML Syntax:
- <h1>This is heading 1</h1>
- <h2>This is heading 2</h2>
- <h3>This is heading 3</h3>
- <h4>This is heading 4</h4>
- <h5>This is heading 5</h5>
- <h6>This is heading 6</h6>
For WordPress Sites
- To edit or add header tags, select the text in the upper content area of the post or page editor, then choose Heading from the formatting options and assign the appropriate H2, H3, or H4 tag to structure your content properly.

6. Image Optimization
Image optimization is the process of improving images on a website so they load faster, display correctly across devices, and are easily understood by search engines.
It involves reducing image file size without losing quality, using proper file formats, adding descriptive alt text, and ensuring images support the page content. Optimized images help balance visual appeal with performance.
Best Practices for Image optimization
- Choose relevant images for your page that can define the type of content you are providing.
- Select image format between jpeg, png, gif, svg. According to my experience, use webp format because it provides smaller file sizes with high quality, helping pages load faster and improving Core Web Vitals.
- Give your images a descriptive file name because Google uses image file names to better understand what images depict.
- Adding descriptive alt text because search engines use alt text to better understand what an image describes.
HTML Syntax:
- <img src="img_girl.webp" alt="Girl in a jacket" width="500" height="600">
For WordPress Sites
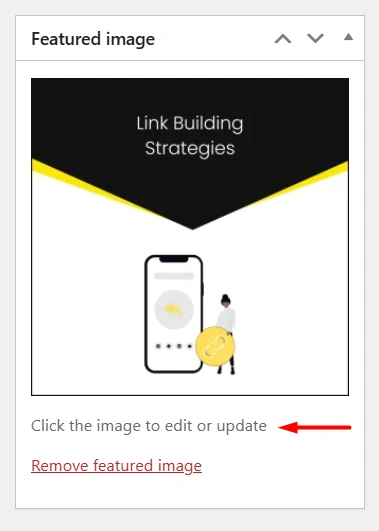
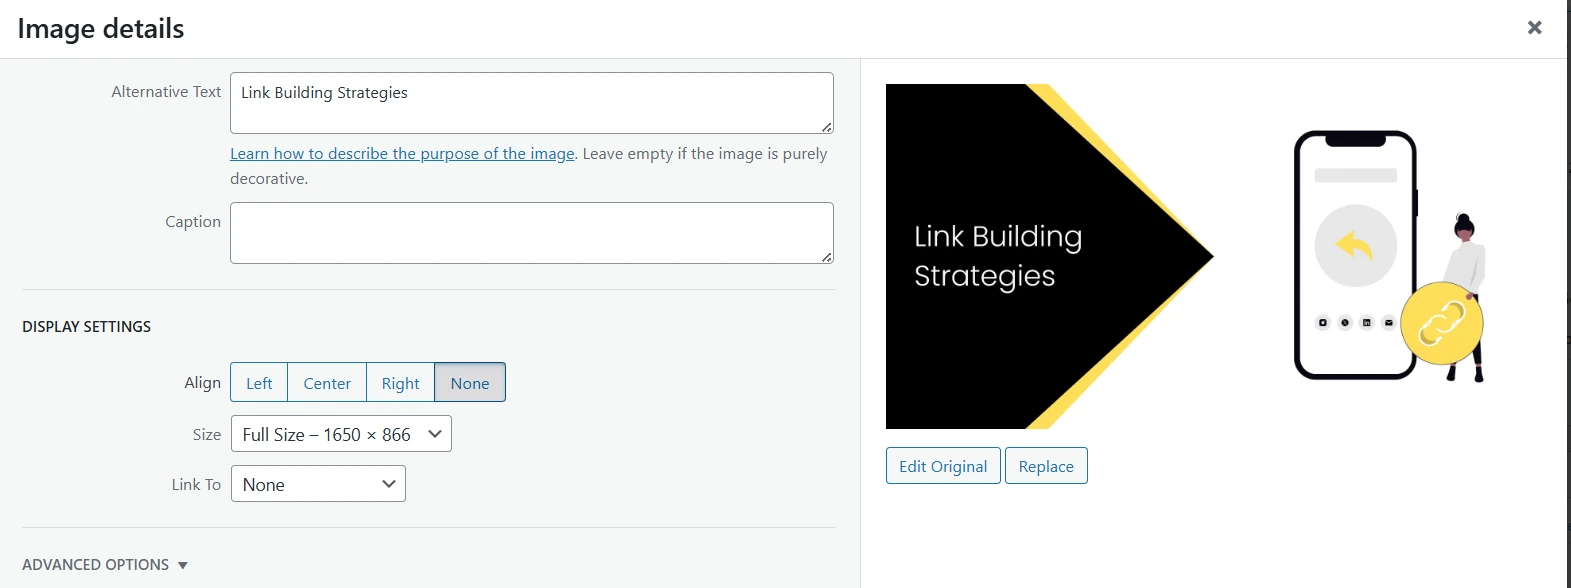
- You can add or change the Featured Image from the right sidebar of the post or page editor by clicking Set Featured Image and uploading or selecting an image.
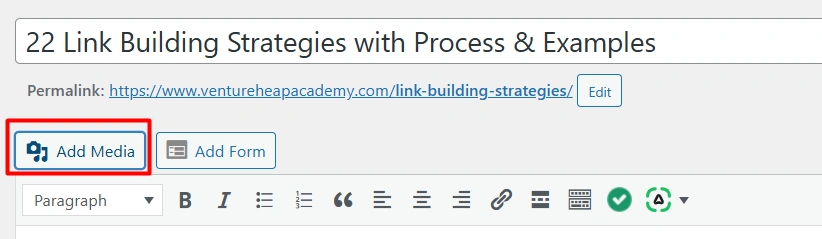
- Add an image inside a blog or page, click the on Add Media button in the editor area, choose Image, and upload or select an image from the media library.
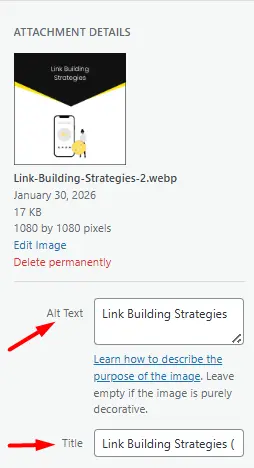
- After inserting the image, click on it and add a relevant Alt Text, proper file name, and optional caption from the right-side settings panel to optimize it for SEO and accessibility.
7. Internal Link
Internal linking is the practice of connecting one page of your website to another page within the same domain. It helps users navigate your site easily and allows search engines to understand the structure and relationship between different pages.
Internal links are added using anchor text, which is the clickable text that directs users to another page. Using clear and relevant anchor text improves user experience and strengthens on-page SEO by signaling the topic and importance of the linked page.
Best Practices for Internal Link
- Only link to relevant pages that relate to the current content page.
- Avoid excessive internal linking as it will show the website is spammy.
- Regularly check for broken links and update those links.
- Use proper HTML anchor tags so search engines can easily follow the links.
- Always keep an internal link on the same tab not on another tab.
HTML Syntax:
- <a href="https://www.ventureheapacademy.com/social-media-interview-questions-and-answers/" > content calendar</a>
For WordPress Sites
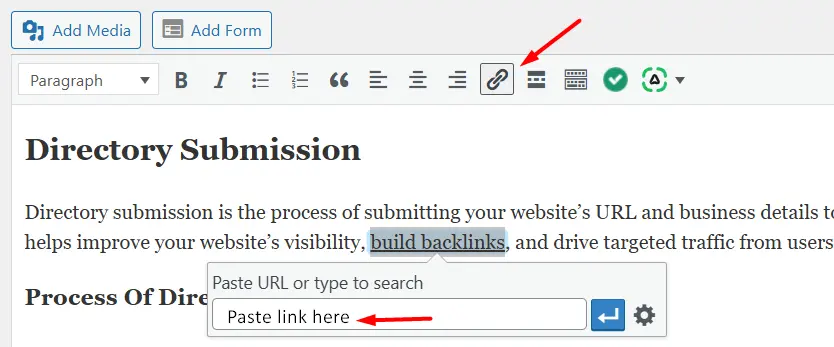
- To add an internal link, highlight the text in the editor area, click the link icon, search or paste the URL of the page/post you want to link, and click Apply.
8. Outbound links
An outbound link is a link that takes users from your website to another website. It is used to give extra information or support your content.
These links help to make your content more useful and trustworthy.
Best Practices for Outbound Links
- You should regularly check outbound links to ensure that they are still working or not. If not then update it immediately.
- Always keep external links to another tab not on the same tab.
- You should always add an outbound link only where the content is defined through that link or where the link explains that content in more detail.
- Always or try to apply a nofollow link to sponsored, affiliate, or untrusted links.
HTML Syntax:
- Without nofollow
<a href="https://example.com/">Click here</a> - With nofollow
<a href="https://example.com/" rel="nofollow">Click here</a> - For Opening in new tab
<a href="https://example.com/" target="_blank">Click here</a>
For WordPress Sites
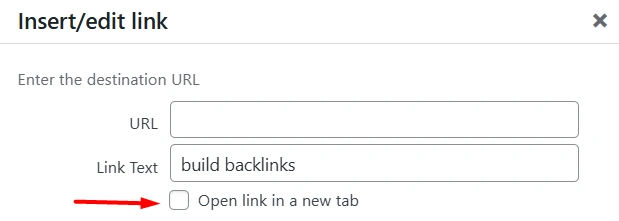
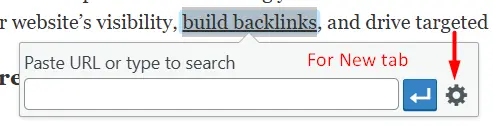
- To add an outbound link, highlight the text in the editor area, click the link icon, enter the external URL, and optionally enable “Open in new tab” for better user experience, then click Apply.
9. Content Length & Quality
Content length and quality mean how well and how clearly your content explains a topic. Good content is not about writing more, but about giving the reader the right and useful information.
For example:
- Low quality content:
“Content is important for SEO.” - Better content:
“Content is important for SEO because it helps search engines understand your website and helps users find the information they are looking for.”
Best Practices for Content Length & Quality
- Write your content in a way that answers the reader’s question.
- Keep your content clear, helpful, and easy to understand.
- Don’t add extra words just to make it longer.
- Use headings and small paragraphs to make reading easier.
- Give examples or explanations to support your points.
- Update your content when information changes.
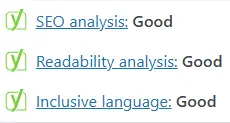
SEO tools like Yoast SEO check this readability. If your text is well-structured with headings, short paragraphs, and proper spacing, Yoast shows a green mark, which means your content is easy to read and SEO-friendly.
Also, you can refer to our detailed guide on various link building strategies to understand the content length and quality.
10. Keyword Density
Keyword density shows how many times a keyword appears in your content compared to the total number of words. It helps measure how focused your content is on a specific topic.
Using too many or too few keywords can reduce your page’s ranking in search results.
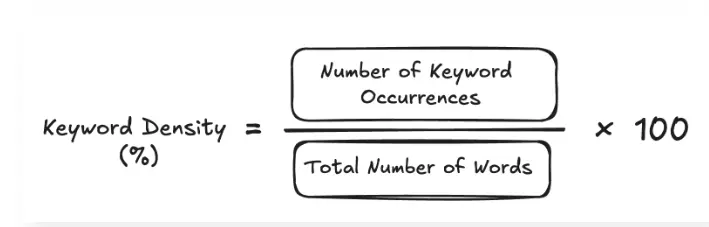
Image Source: [netpeak.us]
For example: ”If a page has 1,000 words and a keyword appears 20 times, then:
20 ÷ 1000 × 100 = 2% keyword density”
Best Practices for Keyword Density
- Utilize synonyms (eg: LSI keywords) or related terms instead of repeating the exact keyword, which helps search engines to understand the context.
- A simple rule is to use your keyword about 1 to 3 times in every 100 words.
- There is no fixed rule from search engines, but this range is considered safe and effective for SEO.
- Ignore keyword stuffing (Keyword stuffing is the practice of using too many keywords in content in an unnatural way to try to rank higher in search engines) it may lead to google penalties and poor user experience.
11. Keyword Distribution & Proximity
Keyword Distribution means spreading your keywords evenly throughout your content, like in headings, paragraphs, and meta descriptions. It refers to the closeness or distance between two or more keywords in a body of text. It represents how near or far keywords are to each other within the content.
For example:
Keyword Distribution: In a 1,000-word article about “home workout exercises,” mention the keyword in the introduction, subheadings, and conclusion instead of repeating it all in one paragraph.
Keyword Proximity: For the keyword "dog food," the sentence "The best dog food for puppies" has high proximity (0 words between them), which is better than "The dog loves to eat all kinds of food" (low proximity).
Best Practices for Keyword Distribution & Proximity
- Place your keywords naturally throughout the content, not just at the start or end.
- Keep related keywords close together in sentences so your message is clear.
- Don’t force keywords to write in a way that sounds unnatural to readers.
- Use similar words and variations to explain your topic without repeating the same keyword too much.
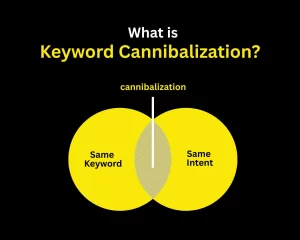
12. Avoid Keyword Cannibalization
Keyword cannibalization is an SEO problem that occurs when multiple pages on a website focus on the same or very similar keywords. This causes the pages to compete against each other in search results, which can weaken the site’s ability to rank well.
For example, “if a website has two blog posts about home workout routines, they can end up competing with each other in search results. Combining them into one complete article would likely get more traffic. Having multiple pages on the same topic can actually lower your overall visibility instead of helping it.”
Best Practices for Avoiding Keyword Cannibalization
- Use one main keyword per page to avoid competition between your own pages.
- Combine or merge similar content instead of creating multiple pages with the same topic.
- Use internal linking wisely to show search engines which page is most important.
- Update meta titles and headings to make each page target a unique keyword.
- Use Canonical Tags If you must keep multiple, similar pages, use to instruct search engines to prioritize the main page.
- Regularly audit your site to find and fix cannibalized keywords.
13. Broken Links and Redirection
A broken link is a link that no longer works and shows an error page when someone clicks it.
This usually happens when a page is deleted or its URL is changed.
Redirection is used to send visitors from that broken or old link to the correct page.
It helps users and search engines reach the right content without any trouble.
For example: “A blog post URL changes from /seo-tips to /seo-guide, redirects the old link to the new one so visitors don’t see a 404 error.”
Best Practices for Broken Links and Redirection
- Avoid creating long chains of redirects, as they slow down your site.
- Keep your website’s internal links updated when you change URLs means that whenever you change a page’s web address, you should also update all the links on your website that point to that page.
- Regularly check your website for broken links and fix them.
How to Check Broken Links?
- With the help of GSC (Google Search Console), Go to Pages or Indexing, and check the Not Found (404) errors to identify broken URLs and where they are linked from. You can then fix the issue by removing the old or incorrect links pointing to those pages.
- You can also find broken links on other websites by using tools like Ahrefs Broken Link Checker, which helps you identify dead URLs so you can remove or update those incorrect links.
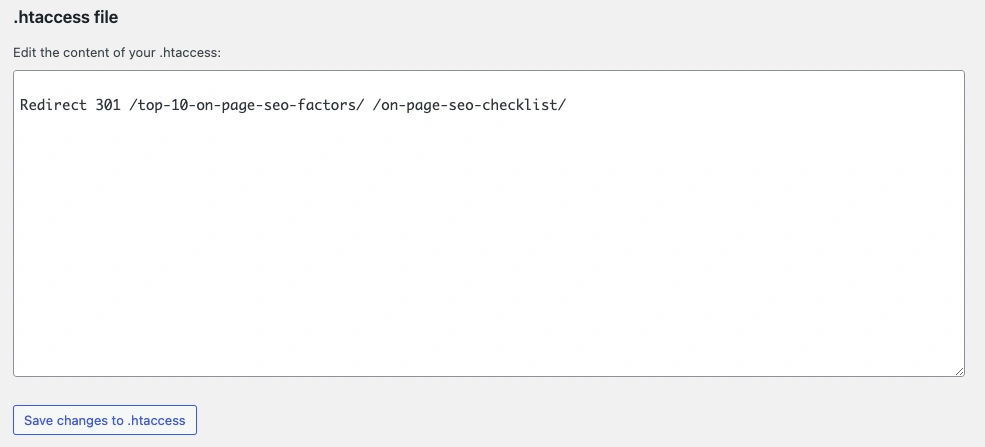
How to do Redirection Or Redirect the URL?
- Create a redirect by going to Yoast - Tools - File Editor, then adding the redirect code to the file (such as .htaccess) and saving the changes to apply the redirect. (Redirect 301 /old-page-url/ /new-page-url/)
14. Schema Markup
Schema markup (also known as structured data) is a special code added to your website that helps search engines understand your content more clearly. It tells Google what your page is about whether it’s a product, a recipe, a review, an event, or something else.
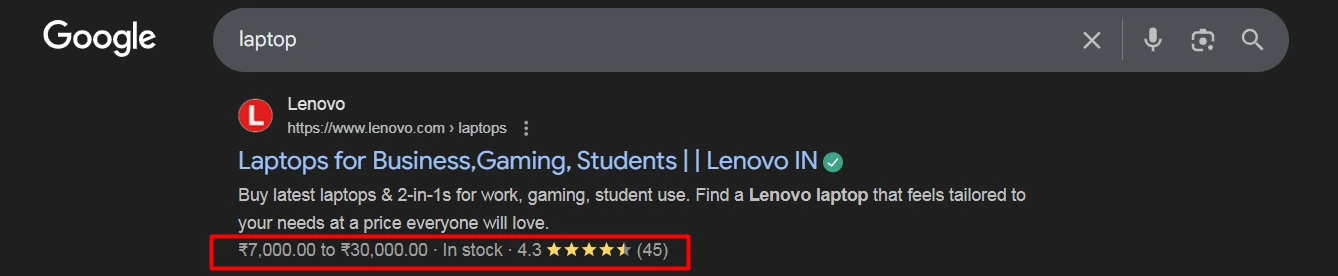
When schema markup is added correctly, search engines may show extra details in search results, such as star ratings, prices, availability, FAQs, or event dates. These enhanced results are called rich snippets. They make your website stand out and help users get important information before they even click your link.
For example: Lenovo implements schema markup on its laptop product pages to provide structured data about pricing, availability, and user ratings. This helps Google display rich search results, such as price ranges and stock status, directly on the SERP. Although schema markup increases the chances of rich snippets, Google still decides whether to show these enhanced results.
Best Practices For Schema Markup
- Use JSON-LD format, Google recommends JSON-LD because it’s easier to implement and maintain without changing your page’s HTML.
- Use the correct schema type for your content (Product, Article, FAQ, Review, Event, etc.).
- Make sure the information in the schema matches what users see on the page.
- Add schema only to useful and relevant pages, not every page.
- Avoid adding fake or misleading data to get rich results.
- Test your schema using Google’s Rich Results Test or Schema Validator.
- Fix any errors or warnings shown in testing tools.
- Keep schema updated when prices, availability, or content changes.
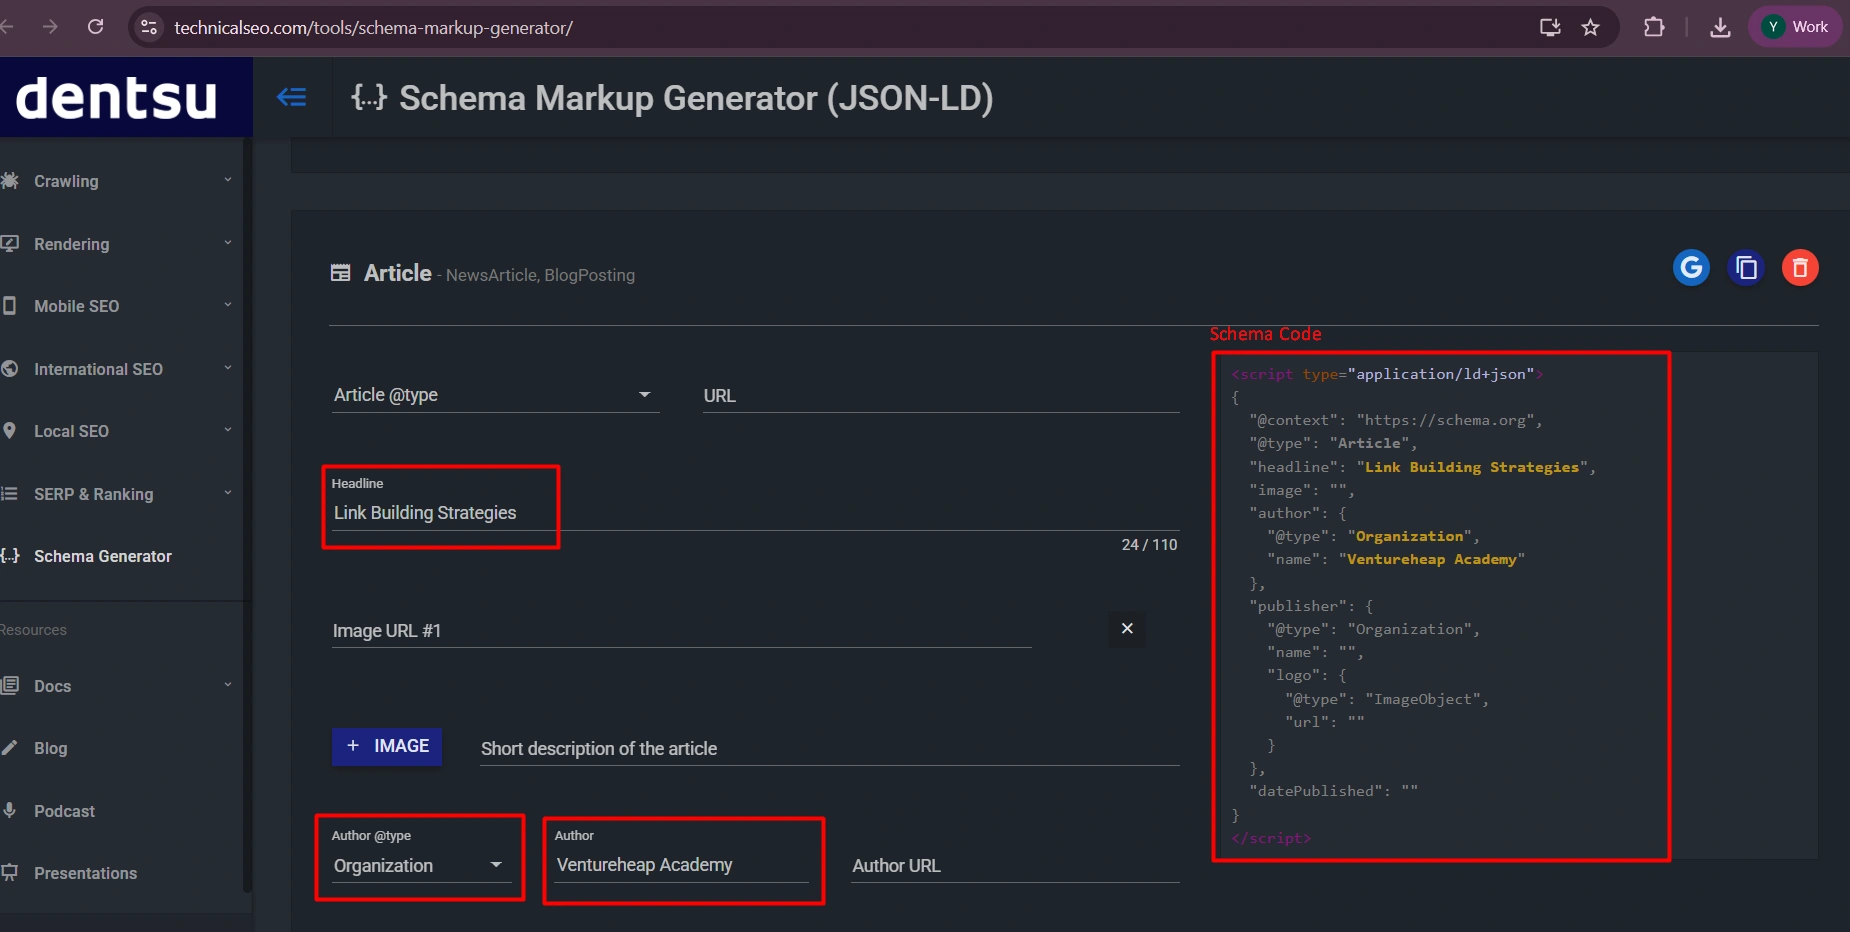
For Coding Sites
- You can generate JSON-LD schema using a tool like TechnicalSEO, then copy the code and place it inside the website’s <head> section to enable schema markup.
For WordPress Sites
- The Yoast SEO plugin automatically provides schema markup by default, so your pages already include structured data without any manual setup.
15. OG Tags
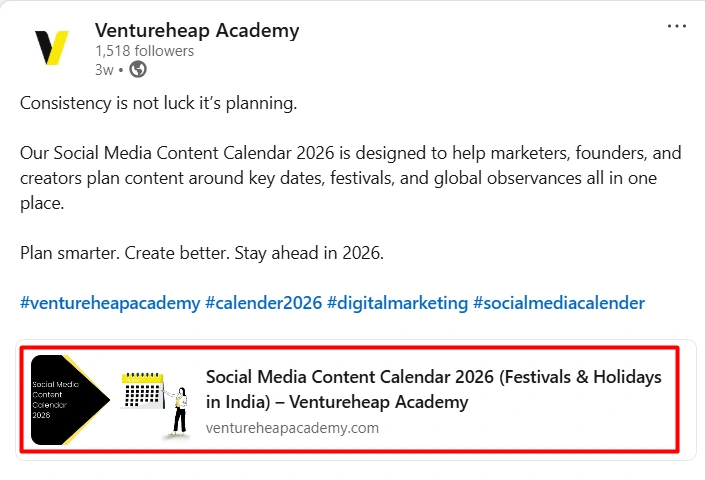
Open Graph (OG) tags are small pieces of code that control how your web page appears when it’s shared on social media platforms like Facebook, LinkedIn, and WhatsApp.
Here’s an example of Open Graph (OG) tags for the Ventureheap Academy Linkedin page:
Best Practices for OG Tags
- Always use the main OG tags so that every page should include og:title, og:type, og:image, and og:url so social platforms know what to show when your link is shared.
- Write clear, clickable titles: keep og:title under 60 characters and make it sound natural and appealing, not stuffed with keywords.
- Use og:description to explain what the page is about and why someone should click. Short and clear works best.
- Your og:image should be about 1200 × 630 px, sharp, and lightweight (ideally around 1MB).
HTML Syntax:
You need to put the below code in your <head> section of the page.
- <meta property="og:title" content="Your Page Title Here" />
- <meta property="og:type" content="website" />
- <meta property="og:URL" content="https://www.ventureheapacademy.com" />
- <meta property="og:image" content="src="https://www.ventureheapacademy.com/wp-content/w3-webp/uploads/How-to-Increase-Instagram-Followers-1024x538.pngw3.webp" />
- <meta property="og:description" content="Write your page description here." />
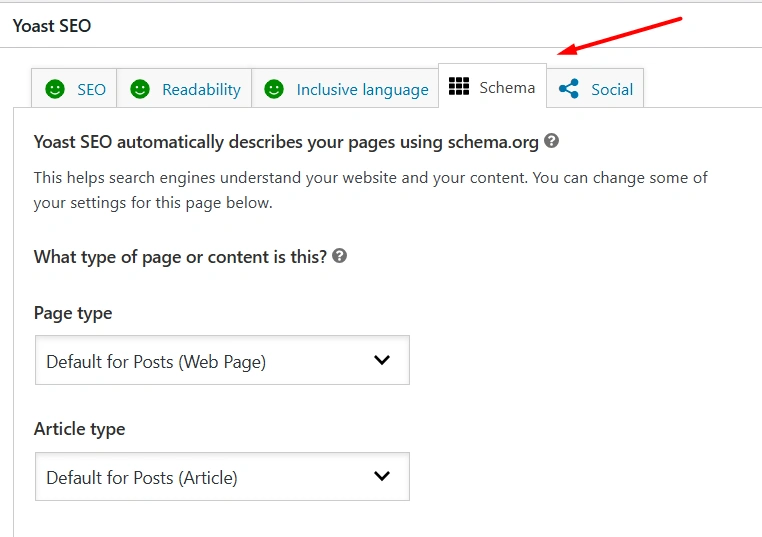
For WordPress Sites
- Open the page or post you want to edit
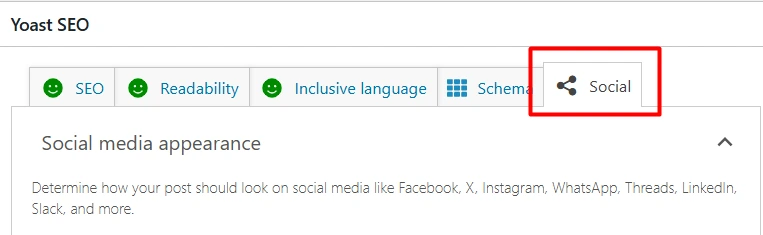
- Scroll down to the Yoast SEO section
- Click the “Social” tab
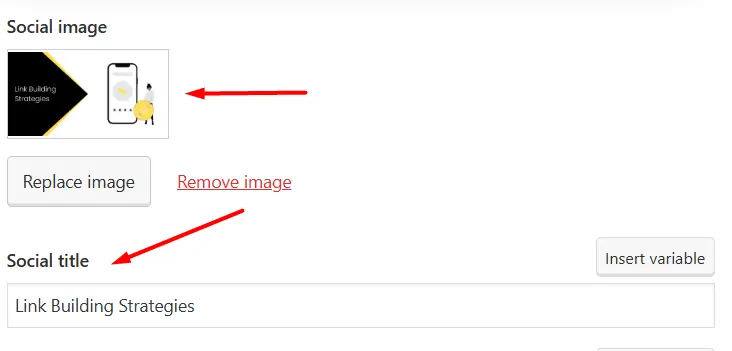
- Upload your OG image
- Add your OG title and OG description
- Save or update the page
For example:
16. W3C code Validation
W3C code validation is the process of checking your website’s HTML, CSS, and other code against the official web standards set by the World Wide Web Consortium (W3C). It helps you find errors, broken tags, and bad syntax that can cause layout issues, poor performance, or accessibility problems.
Valid HTML can positively impact search engine optimization (SEO) by making it easier for search engines to crawl and index your content, potentially resulting in higher search engine rankings.
Best Practices for W3C Validation
- Use proper tags like headings, lists, and layout tags (header, nav, article) to structure your content clearly.
- Use double quotes for attribute values, like <img src="image.jpg" alt="Description">.
- Keep all styling in CSS instead of HTML so your code stays clean and easy to manage.
- Avoid inline styles and use CSS files to control how your website looks and behaves.
- Add alt text to images and use semantic elements so everyone (and search engines) can understand your content.
- Run your site through W3C validators and test it on different browsers and devices to catch errors early.
How to Check W3C Code Validation?
- The W3C provides free online tools to check your website's code:
- W3C Markup Validation Service: For checking HTML and XHTML documents.
- W3C CSS Validation Service: For checking Cascading Style Sheets.
You can use these tools by entering a page's URL, uploading a file, or directly inputting the code. The validator will generate a report listing errors and warnings to help you identify and fix potential issues.
Conclusion
On-page SEO plays a key role in how well your website performs in search results. When your pages are clear, well-structured, and easy for both users and search engines to understand, your chances of ranking higher increase.
By applying these optimization practices consistently and keeping your content updated, you can build a website that attracts more visitors, delivers a better user experience, and achieves long-term growth in organic traffic.
I am an SEO Executive and Digital Marketer who blends technical SEO knowledge with impactful content writing. I specialize in creating SEO-focused blogs and engaging social media content that strengthens brand presence, improves rankings, and drives meaningful audience engagement.

Recent Posts
- SEO vs SEM: Key Differences & Career Pathways February 9, 2026
- Small Business SEO: Quick Start Guide February 4, 2026
- How to Become an SEO Expert: Beginner's Guide February 4, 2026


